Store
The Store manager allows you to manage your own searchable catalog of products. Choose from several integrated payment processors including PayPal and Payflow Pro. (Separate agreement with payment processor may be required.)
Who has access:
You must have one of the checked permissions to use this manager.
Guest
Member
Contributor
Editor
Administrator
Store Coordinator

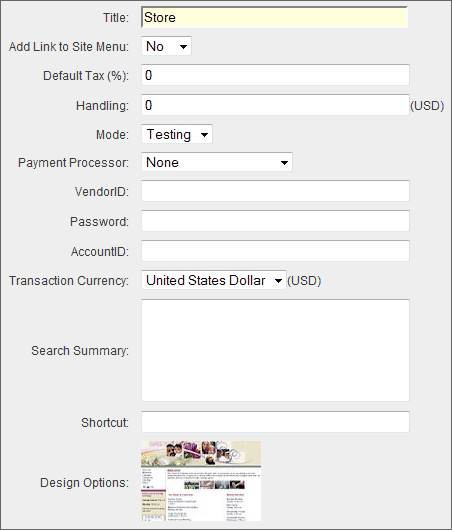
- TITLE: Enter a title for your Store section. This title will appear on your main menu should you choose to display the link.
- ADD LINK TO SITE MENU: Select "Yes" from the drop down menu to display the link on your menu. Select "No" from the drop down menu to not display the link on your menu.
- DEFAULT TAX: Enter the default tax percentage amount to be applied to each order. Tax charges may not apply to everyone. Check with your organization accountant for tax information.
- HANDLING: Enter the amount you plan to add for handling to each order, if any.
- MODE: Select the mode for which you want to process payments. "Testing" mode allows you to send and collect data without actually processing the information. "Live" mode allows you to process the data.
- PAYMENT PROCESSOR: Select your payment processor from the drop down menu. The next 3 fields will highlight accordingly based on your selection. The highlighted fields are the required fields for the selected payment processor. (Note: See the Payment Processors section below for more information.)
- VENDOR ID: Enter your payment processor VendorID.
- PASSWORD: Enter your payment processor Password if applicable.
- ACCOUNT ID: Enter your payment processor AccountID if applicable.
- TRANSACTION CURRENCY: Allows customers using Authorize.net or PayPal to match their web site Store manager currency to the primary currency set at their payment processor.
- SEARCH SUMMARY: Enter descriptive information to be used for Search Engine data and Site Search data.
- SHORTCUT: This allows you to make a shortcut to your Store. It will be a one word entry (i.e. store). It can be accessed on the Web by typing in www.yourdomainname/shortcutname. (For example: www.yourdomain.com/store).
- DESIGN OPTIONS: Click the design option that is currently shown. A window will appear with the other designs you made available in the Additional Designs section of your Designs manager. Select the design you want to apply to this page.
A payment processor is a company that provides the processing of credit card transactions.
Offline Payment Processing
By choosing "none" from the Payment Processor menu you can use the store as a data collection point for orders even if you do not have a payment processor. Because we can only store the last four digits of credit cards in the system, in order to meet Payment Card Industry standards, you will be responsible for contacting customers for the remainder of the card number in order to complete credit card transactions.
For most organizations, we have found that using PayPal typically results in the lowest total cost per transaction for smaller order volumes, but we encourage you to investigate all of the processors available in the Payment Processor menu in the Store Manager Settings tab to find the best fit for your organization's specific needs.
Authorize.net Users
Enter the following information if you are using Authorize.net as your payment processor.
- VENDOR ID: This is the API Login ID provided from Authorize.net
- PASSWORD: Enter "%00" (without the quotation marks). This is a percent sign followed by 2 zeroes.
- ACCOUNT ID: Transaction Key generated from within your Authorize.net Control Panel
Note: Make sure you have updated your Relay Response URL to use https://draco.websrvcs.com. To change the URL follow the below steps.
- Login to your Authorize.Net account.
- Select Settings and Profile.
- Select Relay Response.
- Update the Relay Response URL to include https://draco.websrvcs.com.
- Click Submit.
Payflow Pro Users
Enter the following information if you are using Payflow Pro as your payment processor.
- VENDOR ID: Enter the Merchant Login ID you selected when you signed up.
- PASSWORD: Enter the password you selected when you signed up.
- ACCOUNT ID: (optional) Enter the Partner ID for the organization from which you purchased the service. The default is "VeriSign".
PayPal Users
Enter the following information if you are using PayPal as your payment processor.
- VENDOR ID: Enter the email address associated with your PayPal account.
- Add/Edit page contents using the Page Editor. For help with the functionality of the Page Editor, see Using the Editor for more information.
- Click the Save
 icon in the upper right corner of your screen to save your Store manager page settings.
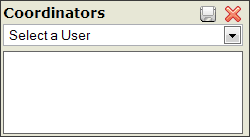 This feature is only applicable to those who have the People manager.
- Select an appropriate person from the drop down menu. The list of names that appear is populated from your People manager. The person must have an email address entered in your People manager in order to appear.
- Click the Save
 icon within the dialog box.
- Repeat steps 2 and 3 for each Coordinator you want to add.
- To delete a Coordinator, click the Delete
 icon to the left of the person's name.
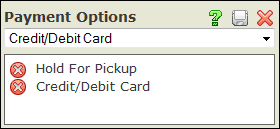
This allows you to choose which methods of payment you will accept for purchases made in your store.
- Select a payment method from the drop down menu.
- Click the Save
 icon within the dialog box. The payment method is now available to be selected by users when making their purchases.
- Repeat steps 2 and 3 for each Payment Option you want to add.
- To delete a payment option, click the Delete
 icon to the left of the payment option.
 Note:
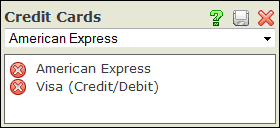
Note: The Credit Cards tab will not appear until you select "Credit Card" in the Payment Options section.
- Select a credit card type from the drop down menu.
- Click the Save
 icon within the dialog.
- Repeat steps 2 and 3 for each Credit Card type you want to add.
- To delete a credit card, click the Delete
 icon to the left of the card name.
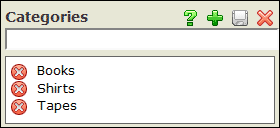
This is used to organize your store items. For example, if you are selling multiple books, you can create a "Books" category.
- Type the name of your category into the Categories input box.
- Click the Save
 icon within the dialog box.
- Repeat steps 2 and 3 for each Category you want to add.
- To delete a category, click the Delete
 icon to the left of the category name.
-
Select the Add New Item

icon.
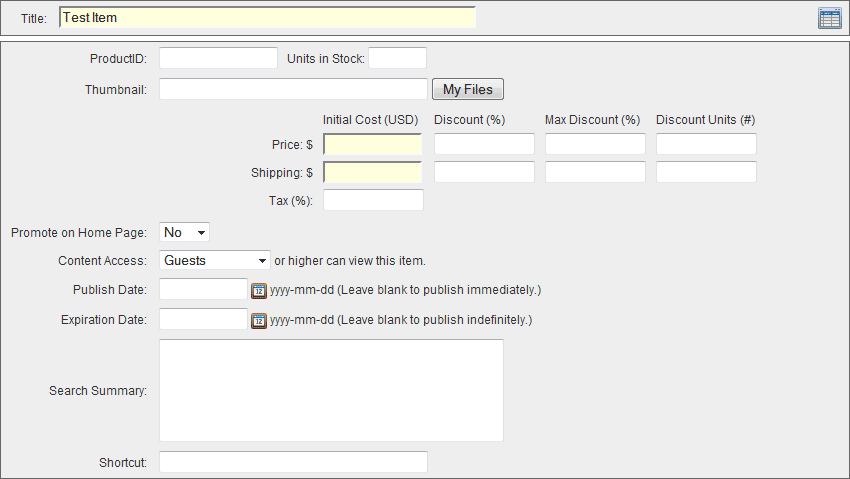
- TITLE: Type in the name of the product or service. Do not use commas or other special characters in the title of a store item, as it will cause problems with submitted orders.
- PRODUCT ID: Enter the product ID number/listing, if applicable. This is for internal tracking purposes and will not appear on the public website.
- UNITS IN STOCK: Enter the number of this item available. This is for internal tracking purposes and will not appear on the public website.
- THUMBNAIL: To associate a thumbnail image with your item, click the My Files button to the right of the Thumbnail field. For more information on inserting images, see the Insert/Edit Images section of the Help Manual.
- PRICE: Enter the basic price for this item.
- DISCOUNT PERCENTAGE: If a discount will be given for ordering a specific number of items, add in here. The Store will post 0 if no amount is entered, indicating no discount is offered. (For example, if a 5% discount will be given for ordering more than 5 of this one item, type in 5 here.)
- MAX DISCOUNT: The maximum percentage amount offered for multiple-item orders.
- DISCOUNT UNITS: Type in the number of items to be purchased in order to receive a discount. The Store will default to 0 if no number is entered, indicating no discounts will be offered.
- SHIPPING: Type in the cost for shipping this item. Cost will be automatically added into the purchaser's total.
- TAX: Type in the percentage of tax (if any) that will apply to this item.
- PROMOTE ON HOME PAGE: Select "Yes" to automatically add a link to the store item in the feature (Just For You) section of your home page.
- CONTENT ACCESS: This allows you to set the minimum security level required to view your store item. For more information on setting access, see the People manager, as this option will only appear to those who have the People manager.
- Guest: This allows anyone who visits your site to view your store item.
- Member: This allows only those who have Site Member access or greater to view your store item.
- Contributor: This allows only those who have Site Contributor access or greater to view your store item.
- Editor: This allows only those who have Site Editor access or greater to view your store item.
- Administrator: This allows only those who have Site Administrator access to view your store item.
- PUBLISH DATE: Click the calendar icon to the right of the Publish Date field to bring up the interactive calendar and choose the date that your store item will be available to users. Leave the Publish Date field blank to make your store item available immediately. Alternatively, you may click inside the Publish Date field to bring up the interactive calendar.
- EXPIRATION DATE: Click the calendar icon to the right of the Expiration Date field to bring up the interactive calendar and choose the date that your store item will expire. The store item will appear through the end of the date you select. The end time is determined by your Time Zone selection within the Home Page Settings area. Leave the Expiration Date field blank to make your store item available immediately. Alternatively, you may click inside the Expiration Date field to bring up the interactive calendar.
- SEARCH SUMMARY: Enter descriptive information to be used for Search Engine data and Site Search data.
- SHORTCUT: This allows you to make a shortcut to a specific store item. It will be a one word entry (i.e. myitem). It can be accessed on the Web by typing in www.yourdomainname/store/shortcutname. (For example: www.yourdomain.com/store/myitem). Note: You must create a shortcut in the Manager Settings section of the Store in order for the shortcut to the specific store item to work.
- Add/Edit page contents using the Page Editor. For help with the functionality of the Page Editor, see Using the Editor for more information.
- Click the Save
 icon in the upper right corner of your screen to save your Store Item settings.
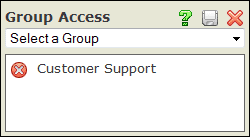
This allows you to make an item viewable only by users in the selected group or groups. The user must be granted Member access or greater within the group to see the item. For more information on setting access, see the
People manager.
- You must first setup your target groups in the Groups manager.
- Users must be assigned to the group to be included in the target groups. This can be done by the individual through setting his/her preferences at log in or by changing those preferences from your Web site's home page. You can also do this manually through the People manager.
- Choose the group you wish to grant access and click the Save
 icon in the upper right corner of the dialog box.
- To delete a group, click the Delete
 icon to the left of the group name.
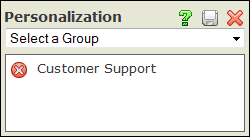
This allows you to limit promotion of this item's content on your Home page to specific groups. You must set Promote on Home Page to "Yes" to promote the item.
Note: This tab only appears if you have the
People and
Groups managers.
- You must first setup your target groups in the Groups manager.
- Users must be assigned to the group to be included in the target groups. This can be done by the individual through setting his/her preferences at log in or by changing those preferences from your Web site's home page. You can also do this manually through the People manager.
- Choose the group you wish to grant access and click the Save
 icon in the upper right corner of the dialog box.
- To delete a group, click the Delete
 icon to the left of the group name.
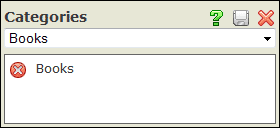 The categories you created earlier now appear in the drop down menu.
- To list your new item within a category, select the appropriate category from the drop down menu.
- Click the Save
 icon within the dialog box.
- Repeat steps 2 and 3 for each category you want to add.
- To delete a category, click the Delete
 icon to the left of the category name.
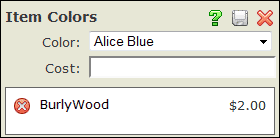 Select a color from the drop down menu.
- If there is an added cost for the color, enter the amount accordingly. If there is no extra charge for the color, type in 0.
- Click the Save
 icon within the dialog box.
- Repeat steps 2 and 3 for each color you want to add.
- To delete a color, click the Delete icon
 to the left of that color.
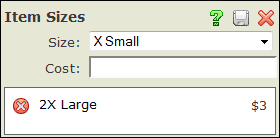 Select a size from the drop down menu.
- If there is an added cost for the size, add in that charge (For example, $1 extra for X-large). If there is no extra charge for that size, type in 0.
- Click the Save
 icon within the dialog box.
- Repeat steps 2 and 3 for each size you want to add.
- To delete a size, click the Delete
 icon to the left of the size.
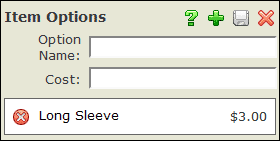 Type in any additional options related to the product (For example, Long Sleeve or Rush Delivery).
- Enter any additional charge for that option in the cost box.
- Click the Save
 icon within the dialog box.
- Repeat steps 2 and 3 for each item option you want to add.
- To delete an additional option, click the Delete
 icon to the left of the option name.
Note: PayPal Users: If you have a cost associated with an Item Option, it does not get sent over to PayPal. The best solution is to setup a separate Store Item for each cost difference. For example: If you are selling a picture and have 5x7 and 8x10 as Item options but the 8x10 is $2.00 more, create a separate Store Item for the 8x10 picture.
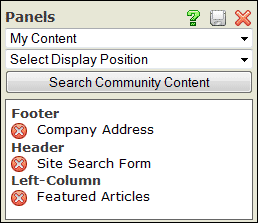 Add/Delete Panels
- Click the Panels tab.
- Using the first drop down menu, select the panel you wish to display.
- The panel you select will appear in the preview window at the bottom of the Panels dialog box.
- Using the second drop down menu, select the display position for the area you want the panel to appear on your site.
- Click the Save
 icon within the dialog box. Repeat this process for each panel you wish to add.
- To delete a panel placement, click the Delete
 icon to the left of the panel title.
Update Panel Position and Order
- Click the Panel Name
- Using the first drop down menu, select the display position for the area you want the panel to appear on your site.
- Using the second drop down menu, select the order in which you want the panel to display. By selecting "1", the panel will appear first within its assigned position. By selecting "2", the panel will appear second within its assigned position.
- Click the Save
 icon within the dialog box. Repeat this process for each panel you wish to update.
Search Community Content
Select the view for which you want to show information. You can select Item View or Order View. Item View will show a list of all items you currently have available in your Store. Order View will show a list of all current and past orders you have in your Store. By Selecting Order View, an option will appear to Print your orders. You can print them all, or print based on various criteria.
- Delete an item or items by selecting the check box to the left of the Item ID number.
- Click the Delete Selected
 icon. Once an item is deleted, there is not a way to retrieve the item.
- Alternatively, you may click the Delete
 icon within the store item itself.


 This allows you to choose which methods of payment you will accept for purchases made in your store.
 Note: The Credit Cards tab will not appear until you select "Credit Card" in the Payment Options section.
 This is used to organize your store items. For example, if you are selling multiple books, you can create a "Books" category.
 This allows you to make an item viewable only by users in the selected group or groups. The user must be granted Member access or greater within the group to see the item. For more information on setting access, see the People manager.
 This allows you to limit promotion of this item's content on your Home page to specific groups. You must set Promote on Home Page to "Yes" to promote the item.
 This feature is only applicable to those who have the
  The categories you created earlier now appear in the drop down menu.
 Select a color from the drop down menu.
 Select a size from the drop down menu.
 Type in any additional options related to the product (For example, Long Sleeve or Rush Delivery).
 Add/Delete Panels